AContent Template System
AContent Administrators can enable or disable theme, layout, and structure templates through of the Admin's System panel.
The AContent Administrator can add or modify templates in the AContent “templates” directory.
In the templates directory, there are 3 sub-directories called: layout (containing the theme templates), page_template (containing the layout templates) and structures (containing the lesson structure templates). Templates in these 3 directories are available to AContent authors while they edit or create lesson content (theme and layout templates) and/or they create a lesson or an entire course (structure templates).
Each template must be contained in a separated directory, named with the template name. Creating a new template can be done most easily by copying an existing template directory and renaming it, then modifying the files in that new directory to produce a new theme, layout, or structure template. It will automatically become available to authors, reading the accompanying XML file to generate a listing in AContent.
Additional details about creating template follows.
How to add a Theme Template
In the "layouts" directory where theme template are kept (excuse the confusing directory names), there must be a .css file with all the theme's layout and presentational rules that will be applied to the content. Each class or identifier should be a descendent of the #content identifier. The .css file name must be the same of the directory name (and the name of the template). For example italy/italy.css.
#content{
color:
#333;
line-height:
1.5em;
background-color:
#FFF;
text-align:
justify;
}
#content h2{
background:
#365778;
margin-bottom:
10px;
margin-top:
20px;
color:
#FFF;
}
#content h3{
background:
#008d46;
margin-bottom:
15px;
margin-top:
15px;
color:
#FFF;
}
#content h4, #content
h5,
#content h6, #content h7{
background:
#d2232c;
margin-bottom:
10px;
margin-top:
20px;
color:
#FFF;
}
#content h2, #content
h3,
#content h4,
#content h5, #content
h6,
#content h7{
background-image:
url(italy/c_led2.png),
url(italy/c_archivio3.png);
background-repeat:
no-repeat;
background-position:
left center,
right center;
font-size:
0.875em;
height:
32px;
line-height:
32px;
padding:
0px;
padding-left:
20px;
}
#content ul{
margin-top:
30px;
list-style-image:
url(italy/list.png);
}
#content ul li{
padding:
3px;
}
#content a:link{
text-decoration:
none;
color:
#295376;
background:
transparent;
}
#content a:visited{
color:
#5a306b;
}
#content a:hover, #content a:active{
text-decoration:
underline;
color:
#B00000;
}
#content .img{
-webkit-transform:
rotate(3deg);
-moz-transform:
rotate(3deg);
}
#content .img:hover{
-webkit-transform:
rotate(0deg);
-moz-transform:
rotate(0deg);
}
|
If the administrator wants to add images or graphical elements to a theme, they are added to a sub-directory (named with the template name) and referred to in content using relative paths. For example italy/italy/[image.png]
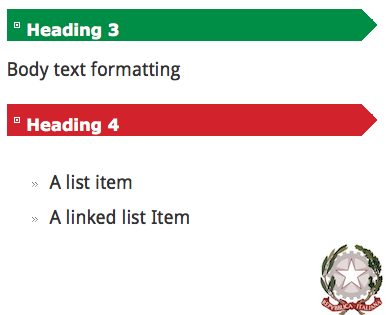
A screenshot image (named screenshot-themename.png) should be added to the template directory to represent how the theme appears. For the Italy theme for example a file called screenshot-italy.png would be added, as shown in the example below. Note that the image will be resized to fit the available area.
A .xml file called layout.xml must be added to the directory to specify metadata for the template, such as: name, description, maintainer name and email address, template version, etc.
The following is an example XML included with the Italy theme:
<?xml version="1.0"
?>
<layout version="0.1">
<name
lang="en">
Italy
</name>
<description
lang="en">
Italy
                      colour scheme.
</description>
<maintainers>
<maintainer>
<name>
Mauro
</name>
<email>
mauro@studio.unibo.it
</email>
</maintainer>
</maintainers>
<url/>
<license/>
<release>
<version>
1.x
</version>
<date/>
<state>
stable
</state>
<notes/>
</release>
</layout>
|
How to add a Page Layout Template
The "page_template" directory is where content page layout templates are kept. Files for each layout are kept in a directory with the same name as the layout, for example "title_2_columns". There must be a .html file in that directory with all the html elements that make up the template. The .html file name must be the same of the directory (i.e. title_2_columns.html).
<div>
<h3>Title</h3>
<table>
<tr>
<td
style="text-align:justify;
vertical-align: top; border-right: 1px solid #EEE; padding:
10px">
Lorem
                      ipsum dolor sit amet, consectetur...
</td>
<td
style="text-align:justify;
vertical-align: top; padding: 10px">
Lorem
                      ipsum dolor sit amet, consectetur adipiscing elit....
</td>
</tr>
</table>
<br
/>
</div>
|
A thumbnail image of the layout must be included in each page layout directory (named screenshot.png) to show the appearance of the layout. The example below is the thumbnail for the Title and Two Column template.

Title and Two Columns Thumbnail
A .xml file called "page_template.xml must be included with each page template to specify its metadata, such as: name, description, maintainer name and email address, template version, etc..
The following is an example page layout template xml file for the title and two columns template:
<?xml version="1.0"
?>
<page_template version="0.1">
<name
lang="en">
Title
                      and 2 columns
</name>
<description
lang="en">
Title
                      and 2 columns
</description>
<maintainers>
<maintainer>
<name>
Mauro
</name>
<email>
mauro@studio.unibo.it
</email>
</maintainer>
</maintainers>
<url/>
<license/>
<release>
<version>
1.x
</version>
<date/>
<state>
stable
</state>
<notes/>
</release>
</page_template>
|
How to add a Lesson Structure Template
The "structures" directory is where the course and lesson structure templates are kept. Like other templates describe above each has its own directory with the directory name the same as the template's name, for example "creativity." There must be a "content.xml" file that defines the lesson structure, describing mandatory and optional content and their allowed instances.
Since each structure template is composed by page templates, it is worth mentioning that values of the attribute name, for the elements page_template must be the names of already existing page templates.
The following is the content.xml file for the "creativity" lesson structure.
<?xml version="1.0" ?>
<structure name="creative">
<page max="1" min="1"
name="overview">
<page_templates>
<page_template
name="overview_creative"/>
</page_templates>
</page>
<folder max="x" min="1"
name="eTivities">
<page max="x" min="1"
name="eTivity">
<page_templates/>
<tests>
<test
name="true_or_false"/>
<test
name="multiple_choice"/>
<test
name="matching_graphical"/>
<test
name="matching_simple"/>
</tests>
</page>
</folder>
<page max="1" min="1"
name="references">
<page_templates>
<page_template
name="unordered_list"/>
</page_templates>
</page>
<page max="1" min="1"
name="goals">
<page_templates>
<page_template
name="goals_creative"/>
</page_templates>
</page>
<folder max="x" min="1"
name="activities">
<page max="x" min="1"
name="activity">
<page_templates>
<page_template
name="plain_text"/>
<page_template
name="title_image"/>
<page_template
name="title_image_text"/>
</page_templates>
</page>
</folder>
</structure>
|
A second XML file called "structure.xml" must also be included with each structure template to specify the metadata for the template, such as: name, description, maintainer name and email address, template version, etc..
The following is an example of a structure.xml file for the "creative" lesson structure:
<?xml version="1.0" ?>
<structure version="0.1">
<name lang="en">
creative based
</name>
<description lang="en">
creative based
</description>
<maintainers>
<maintainer>
<name>
Catia
</name>
<email>
catia@unibo.it
</email>
</maintainer>
</maintainers>
<url/>
<license/>
<release>
<version>
1.2
</version>
<date/>
<state>
stable
</state>
<notes/>
</release>
</structure>
|